Remove an Image Background and Refine the Edges
Run background removal on your device, correct the mask, compose the subject, and inspect difficult edges before export.
How do I remove a background cleanly?
Open Remove background, run the local model, then inspect the mask instead of treating the first result as final. Use Erase to remove background pixels the model retained and Restore to bring back subject pixels it removed. Fine hair, fur, glass, shadows, motion blur, and low-contrast boundaries often need manual correction.
The image stays in your browser. On first use, the tool downloads an AI model of about 220 MB from Hugging Face plus processing resources. The app uses a pinned revision of the BEN2 ONNX model repository. That repository’s description and licence apply to the model; a successful download does not guarantee a correct mask for a particular image.
Refine the mask before styling the result
- Add a still JPG, PNG, or WebP image and choose Remove background. The shared limits are 30 images, 20 MB per image, 100 MB combined, 24 megapixels per image, and 80 megapixels combined, with an 8192-pixel maximum side.
- Wait for the local model and the first mask. Cancellation keeps images that already completed.
- Zoom in around the subject. Use a smaller correction brush near hair, fingers, product handles, and other narrow shapes. Erase only confirmed background; Restore only confirmed subject.
- Check the edge on both light and dark preview backgrounds. A halo that disappears on one colour may remain obvious on another.
- Repeat the review for every batch image. A correction on one composition does not prove that another subject was segmented correctly.
Choose transparency or a composed background
Keep a transparent output when the destination supports it, normally as PNG or WebP. JPG cannot preserve transparency and needs a solid background. The editor can also place the cutout on a solid colour or selected background image, add a shadow, trim empty space, and position or scale the subject.
For an exact canvas, set its width and height, then use subject padding, scale, and position. Padding creates space around the detected subject inside that composition; it is different from the Resize images “Fit with padding” mode, which fits a whole rectangular image inside exact output dimensions.
Edge problems and practical corrections
- Light or dark fringe: inspect the mask at high zoom on contrasting backgrounds and erase the narrow retained fringe.
- Hair or fur disappears: Restore conservatively with a small, softer brush. Some source detail may be too blended with the background to recover automatically.
- Transparent or reflective object is incomplete: compare continuously with the original. Glass and reflections may share the background’s colour and cannot be inferred reliably.
- Shadow looks cut off: decide whether the source shadow belongs to the subject. Restore it where appropriate or add a new composition shadow.
- Edges look good in preview but poor after download: inspect the encoded output at 100% and confirm the chosen format, dimensions, background, and quality.
Final export checks
Check the whole perimeter, interior gaps, transparent pixels, canvas dimensions, and subject placement. Test the downloaded image in its actual destination. Background removal changes visible pixels; it does not establish ownership, authenticity, or permission to use the subject.
For format and transparency choices, read JPG vs PNG vs WebP vs AVIF. For resizing the completed cutout, see Compress vs resize images.
Documented example
Inspect an unretouched model result
This preserved portrait example shows the original and the model output before manual correction. Inspect the hair boundary and partially retained background pixels rather than assuming the first mask is final.
Observed
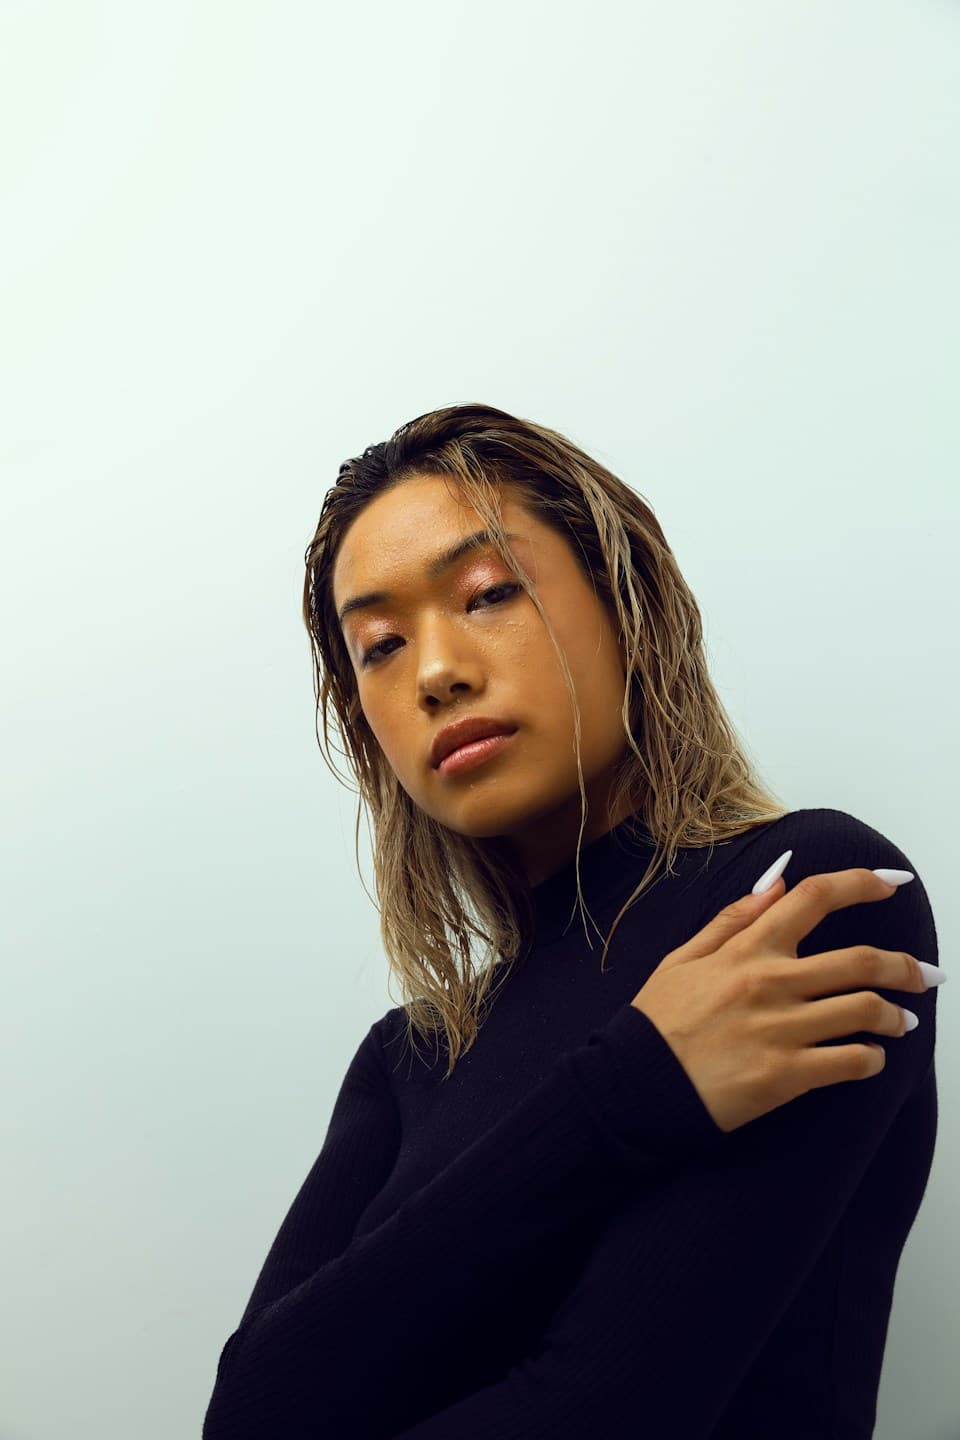
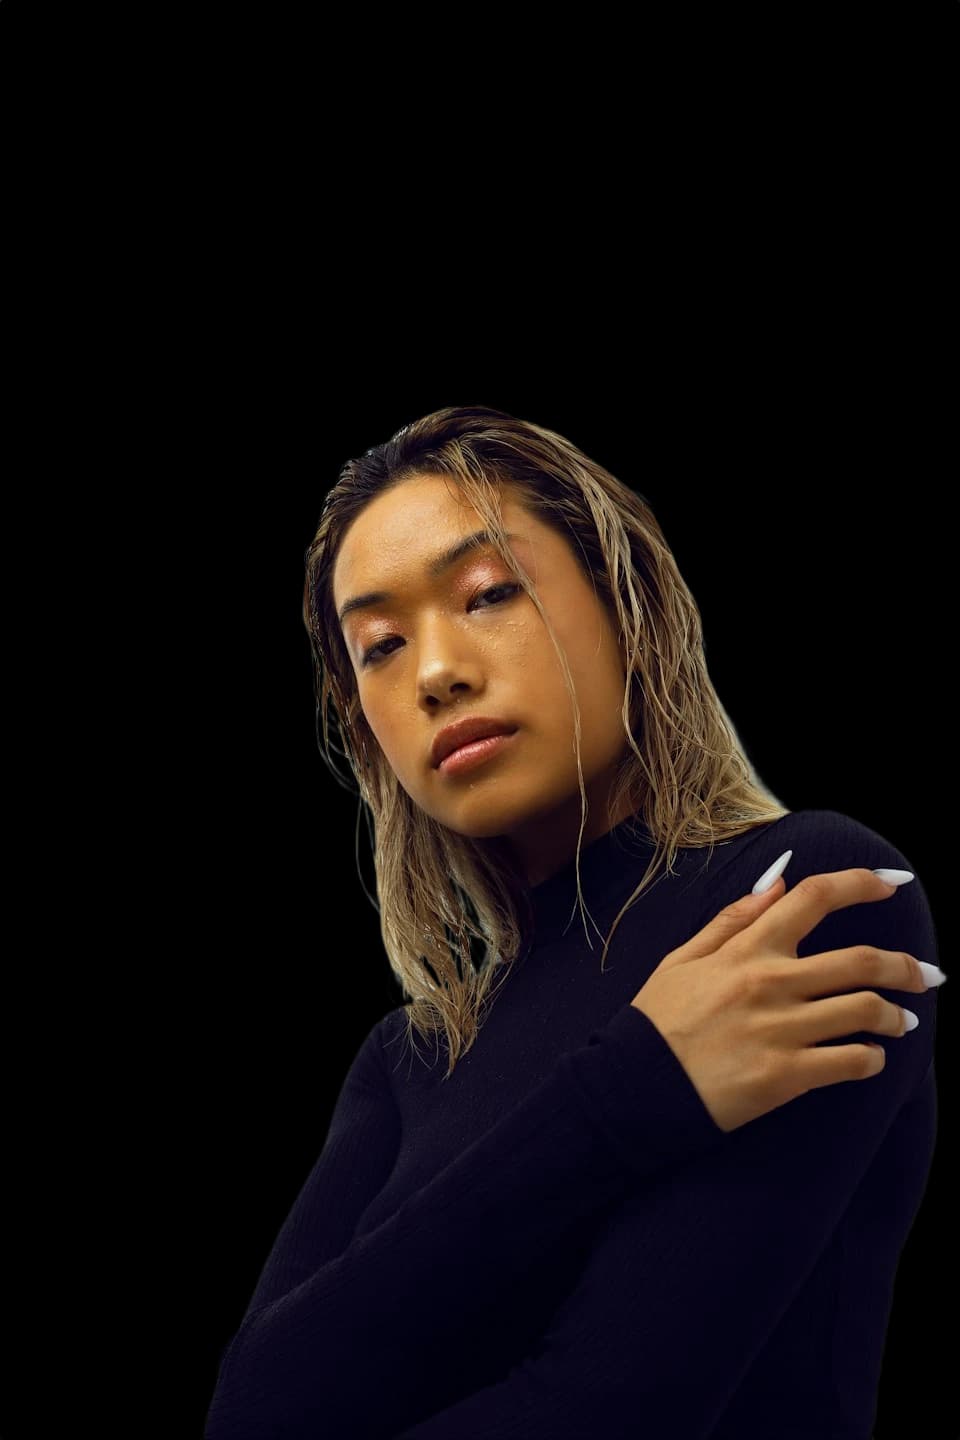
Sources: Photograph: Ayo Ogunseinde on Unsplash · Unsplash License · Pinned BEN2 model revision
Method
Preserved built-in sample documented September 17, 2026 and inspected for this guide September 18. The repository records Transformers.js 4.3.0 with onnx-community/BEN2-ONNX revision c552aa82688edce09f0ac9d2e31ad53d9d629010, fp16, native ONNX WebGPU, and graph optimization disabled. Its mask output was encoded as WebP with alpha retained and no manual retouching. This guide reuses that file; background inference was not rerun for this publication.
Limitations
- One selected portrait does not establish accuracy on other photographs, hair types, glass, fur or complex backgrounds.
- The output contains partially transparent residual background pixels and imperfect edges. Review it on contrasting backgrounds and refine the mask before use.
- The observation date belongs to the preserved sample, not a fresh benchmark. No processing-time or mobile-performance claim is made.
These guides describe PDF Logic’s tools and their limits. Read how this content was prepared or report a correction.
Topics
Continue Reading
More articles you might find useful
JPG vs PNG vs WebP vs AVIF: Choose an Image Format
Compare transparency, compression, browser workflow support, and conversion limits before choosing JPG, PNG, WebP, or AVIF.
Edit Images in Your Browser: A Review and Export Workflow
Prepare still images, choose edits and output settings, review actual encoded results, and download individual files or a ZIP.
Compare Two PDFs: Review Text and Visual Changes
Pair original and revised pages, distinguish text coverage from visual comparison, refine expected differences, and export a review report.